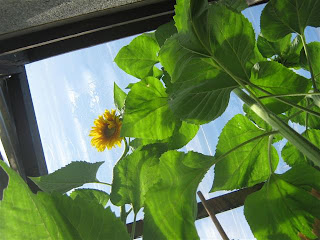
A garden is not a garden without a sunflower. Allison had a hard time taking these photos of our Sunflower. She got pollen in her eyes.
aa
We are still working on it...
Parsley, Fennel, Lavender, Horse Radish, Thyme:
 We decided to plant potatoes here because this is the first crop on this land in decades. Potatoes loosen the ground for future crops. We love potatoes
In April we created fertilized mounds into rows running north to south. Furrows were then opened in each mound. This allowed for earthing up as the plants grew. The potatoes (spuds) were planted about 12 inches apart and covered at a depth of about 6-8 inches.
Here is another angle of our potato patch. There are so many varities of potatoes


the UK and supply it packed to the UK's major supermarkets.
The distributor recommends that the Rooster is extremely versatile, and can be used for chipping, mashing, boiling, baking, and roasting.
WIKI: King Edward potatoes, like the majority of European and North American potato varieties, are derivatives of the 'Rough Purple Chili'[1] which was used as breeding stock after the 1840s Irish potato famine.[2] The King Edward potato is one of the oldest of these varieties.


Sow in fresh tilled mound
Their crown, just above ground
Resist the miser
Add some fertilizer
Water time to time
Bark mulch or straw as prime
Even net o'er head
Ripe and red, cook spread
Really sweet on my bread
You should grow some!
by Patricia Halliday
These strawberries are three years old. We had so much fruit. We ate, baked, froze, cooked... I made a video.
A website all about strawberries is here: Strawberry Plants.
Recipe:
Serves: makes 4-6 jars
Cooking and preparation
- Preparations time: Overnight
- Cooking time: one hour
Ingredients
- 1kg /2lb 3oz strawberries
- 1kg/2lb 3oz granulated sugar or caster sugar
- ½ lemon, juice only
- small knob of butter
Directions:
1. The day before you wish to make the jam, hull and halve the strawberries. Check for soft spots (which must be removed) and discard any berries with bruises or that are overripe.
2. Place the strawberries into a large bowl with 500g/18oz of the sugar. Turn carefully to mix and coat well, then cover with cling film and place into the fridge overnight.
3. The next day, place a saucer into the freezer to chill - you'll need this when you come to test the setting point of the jam.
4. Sterilise the jam jars - first wash the jars in soapy water and rinse in clean warm water. Allow them to drip-dry, upside down, on a rack in the oven set to 140C/275F/Gas 1. Leave them there for at least half an hour while you make the jam.
5. Pour the strawberries, their juice and any residual sugary juices into a very large pan or preserving pan, remembering that the mixture will rise as it boils, and add the remaining 500g/18oz sugar and the lemon juice.
6. Stir over a gentle heat until the sugar has completely dissolved.
7. Bring the strawberries up to the boil then boil hard until the jam reaches setting point. Check the setting point every ten minutes, although it may take up to half an hour to reach setting point.
8. To test the setting point, remove the pan from the heat. Take your saucer from the freezer and place a drop of jam onto the cold plate. After a few seconds push the jam with your finger.
9. If the jam surface wrinkles then it has reached setting point and is ready. If it slides about as a liquid, then it hasn't reached setting point and should be returned to the heat and boiled for a few more minutes before testing again.
10. When setting point has been reached, turn off the heat. Stir in the butter and skim off any scum on the surface of the jam with a large spoon.
11. Let the jam cool and thicken in the pan for ten minutes, so that the strawberries don't all sink to the bottom in the jam jars.
12. Carefully remove the sterilised jars from the oven with oven gloves - try to avoid touching the insides of the jars with the oven gloves, which might introduce unwelcome bacteria.
13. Stir the jam, then ladle it into the sterilised jars. Use a jam funnel, if you have one, to avoid spilling too much jam.
14. Cover the top surface of the jam in each jar with waxed paper discs that have been cut to size - they should cover the entire surface of the jam. Press the wax disc down to create a complete seal.
15. Cover with a lid while still hot, label and store in a cool, dark cupboard for up to a year.
No sugar jam:
2 1/2 pints
Ingredients:
- 2 cups crushed strawberries
- 1 cup crushed peach
- 1/2 cup crushed blueberries
- 1/2 cup crushed cherry
- 1 (1 3/4 ounce) package dry pectin
- 2 cups honey
- 2 tablespoons lemon juice
Directions
Combine 4 cups fruit and pectin in a heavy saucepan.
Bring to a full rolling boil over medium heat, stirring constantly.
Cook for one minute.
Add the honey and lemon juice.
Return to a rolling boil and cook for 5 minutes, stirring constantly.
Remove from heat and skin off the foam.
Ladle into sterilized jars, seal and process in a boiling water bath for 10 minutes.
http://www.recipezaar.com/recipe/Fruit-n-Honey-Jam-49267 Click here: methods and directions to store preserving your strawberries


